Many people create homes with
open rooms then in the end wonder what in the world they should
do with the open space. The grand piano isn't secret storage
nor is it some fantabulous display area, but it does add a
nice touch of class to any room. |
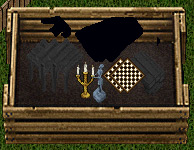
Items Needed:
- 3 Small Wooden Tables dyed dark
- 8 Cloaks dyed black
- 1 Fancy Shirty dyed black
- 2 Checkerboards
- 2 Benches dyed same as tables
- Statue and Candleabra (optional)
|
|
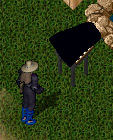
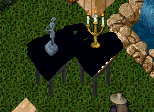
First step is rather simple - place the northernmost table
- this will house one of your "key sets" so be sure
it is at least 1 tile away from a west wall and where you
wish for your piano to end. Don't forget to lock it down.
Next, place a checkerboard on top of the table and lock it
down.
On top of the checkerboard, place a cloak and yes, lock it
down as well. |
|
You have now built the first piece of your piano.
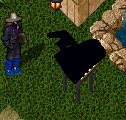
On the tile to the west of the one you just created, place
the fancy shirt and lock it down. Raise it 5 times using the
deco tool.
|
|
The next tile to build on is the south west corner.
First place a small table and lock it down.
On top of this table, stack 3 of the cloaks and lock them
down.
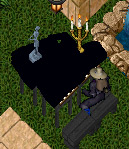
This is probably the best time to place a statue or candleabra
on this tile. I chose the statue as well as added the candleabra
to the first tile we built. |
|
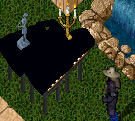
Our final tile to build is also the other
keyboard piece.
Place the final small table down and on top of it, place
the checkerboard. As always, lock them down.
Next place the remaining cloaks, and when they are all locked
down, raise the top cloak up 3 placements, enough to cover
the hole under the short arm of the fancy shirt. |
|
The only flaw in this design is
the small bit of flooring that will show under the long arm
of the fancy shirt.
There is one way to elimate this problem and it is to use
a reversed cloak in place of the fancy shirt or in addition
to (purely up to the individual creating the piano). Otherwise,
it's time to place your benches in front of your piano and
play like you've never played before! |
|