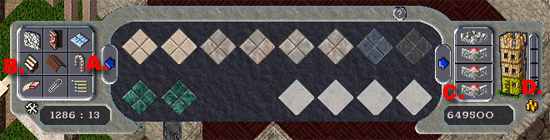
| L-Shaped Stairwells One of the neatest recent discoveries by UO Designer and Decorators is the ability to create spiral staircases as well as the L Shaped staircases. I must thank my friend Faith on Legends for showing me her home and inspiring this tutorial on how to create an L-Shaped Stairwell. The first step in creating your L Shaped Stairwell is to create your home with a nice area for the steps. I must admit I tried all corners of a house and nothing looks nicer than placing your stairwell in the NW corner of the house. Before we start the tutorial there are a few things you have to use:
The trick to doing this is that once you begin creating your specialized stairwell, you CANNOT leave the floor you are building the stairs on. If you accidentally click on the wrong floor (tool D in above table), what you created will not work and you will have to start your stairwell over. Now - lets get to work!
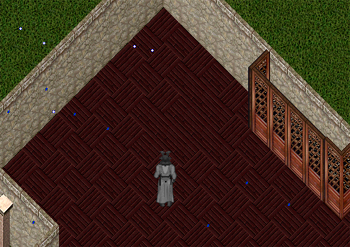
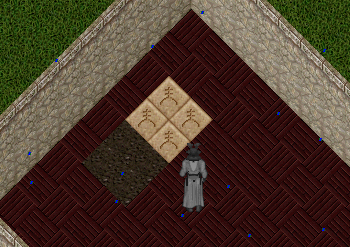
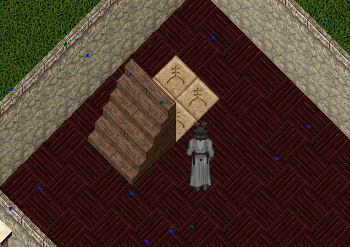
My blank space! I am starting in regular view just as I entered housing customize mode. All my walls are showing and I have a nice blank area to work with. Per my recommendation, my stairwell will be in the NW corner of my house. I want to start by placing the stairs (northbound) where I want the start of my staircase to be. I will then delete them so I am left with a blank area of flooring so I know exactly where my stairs will go. Now, I will place teleporters in the area I want the stairs to disappear.
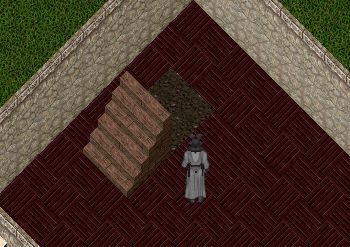
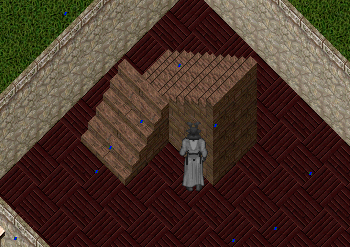
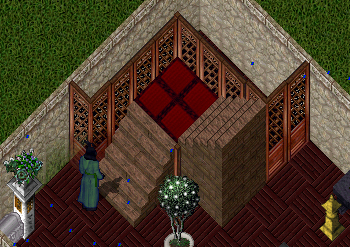
Now, I am going to place the stairs back over the teleporters the same as I placed them before in order to delete the floor tiles that I originally had. Once the stairs on in place, I am going to click on the wall clear of the current floor I am on (see table above for description). By clicking the wall clear TWICE, the walls on the floor I am on SHOULD disappear as well as the stairs. You should see your teleporters clearly enough to use the erase tool on the custom house gump to delete the teleporters. Once you have deleted the teleporters, you are going to then restore the walls by clicking on the floor indicated on the custom house gump (tool D in above table). Be sure you are clicking on the floor you are building on as well as to only click the wall restore ONCE. If you have done the above correctly, you should have the following:
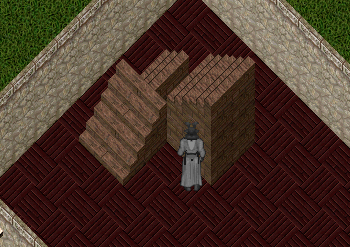
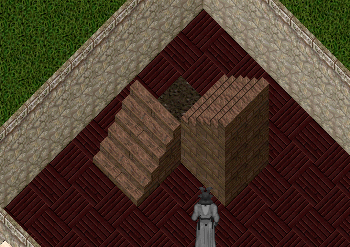
As you can see, the stairs are now cut in half. It is time to build the top half of your L-Shaped Stairwell. Place the teleporters again on the same tiles you had them on before.
Again, place the stairs over the teleporters, only this time I will be using the eastward bound stairs with the bottom of the stairs over the teleporters. This will make it so the bottom half deletes and the top half of the L remains.
Now, again, using the wall clear on the SAME FLOOR you are designing on, click twice. This will cause the walls and stairs to delete and then you will need to remove the teleporters using the delete tool. Same as before, use the wall restore (tool D in table above) on the floor you are working on to restore the walls and stairs. You should be left with the following:
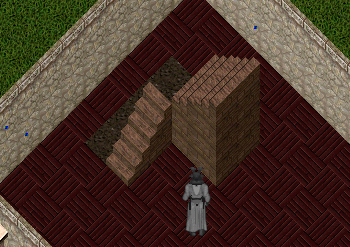
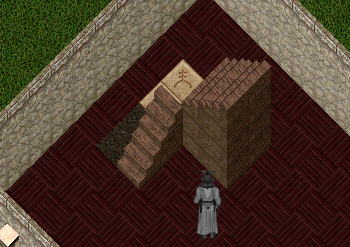
As you can see, there is the very edge of the start of the 2nd set of stairs. Now we are going to delete, the western most set of stairs that are northern bound (yes, the ones you put down in the first step). When you are done deleting that single staircase, you will see that the little "left over" from the 2nd placement disappears.
Place the 2 teleporters in the northwest corner. Do not place them on all 4 spots as you did before.
Again, place the stairs (northerbound) over the teleporters to complete the first level of your L-Shape. Once you have replaced the stairs, click the wall removal twice (same as you have before) and delete the 2 teleporters you just put in. Once deleted, return to the floor (same as before). You will see your L-Shape developing!
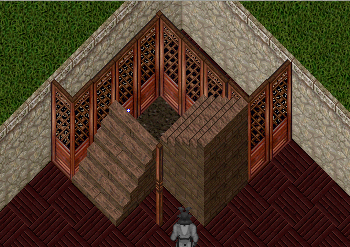
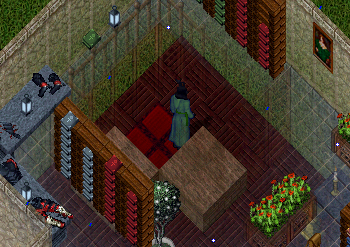
Now, in order to have good floor support for the floor above as well as for decorate appeal, place some nice walls or decorative walls around the stairwell. Below is a screenshot of the walls I put in around my staircase as well as the opening in the floor above. If you have left enough room, you can put some storage areas behind your stairwell.
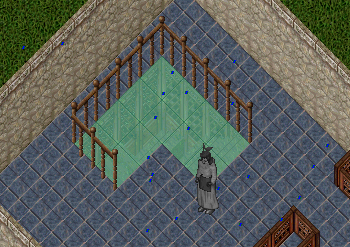
Now, I'm ready to commit - but we aren't done yet! We have to close the gap where the teleporters were with gozas. I am going to use 4 square gozas facing the same direction. You must use square gozas because you cannot raise a regular rectangular goza. You will go up the first part of your L-Shaped Stairwell, and oddly enough, fall into the hole. You will be stuck, but that is ok. Place the gozas inside. If need be, use the circle of transparency.
Now, begin raising the gozas using your house decorator tool. I would suggest raising those on the north side first and then those that are closest to the first level of your L-Shape Stairwell. Raise them until they touch the top of the first level and the bottom of the 2nd level. I raise them about 7 times each just so they will be visible when I leave the house and return to level them up for the final time. To get out of the hole, single click your character in game and choose Leave House. Return to your staircase and look at the gozas. Are they lined up correctly? If not, go ahead and raise and lower them to finish off your stairwell. DONE!
|