Spiral staircases in customized houses are a new find and are very
exciting to all designers of Sosaria. They can be a little complicated
to put together, but they are really not that bad if you take them
step by step, and that is what we are going to do.
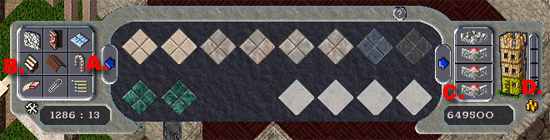
Now, the housing gump below is marked by the different parts of
the gump we are going to use.
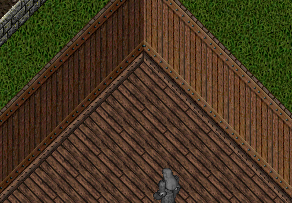
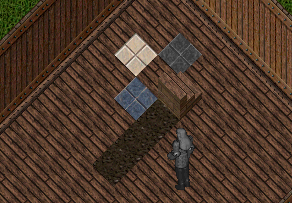
And of course, we start with a blank pallat.
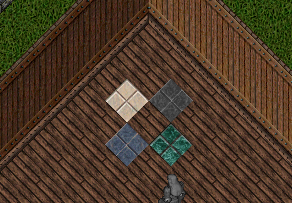
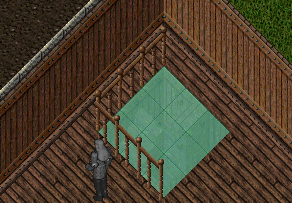
I am going to place some colored floor tiles
in place where the base of the spiral is going to go. This
can help guide you to remember exactly where your spiral staircase
is going to go. Remember, you must leave 1 tile on the edges
so you can have a stable floor on the floor above.
The green tile will be the bottom level, the blue will be
level 2, the white will be leve 3 and the black will be level
4. |
|
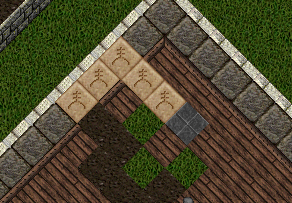
| Place 3 teleporters out from the green tile going south. |
 |
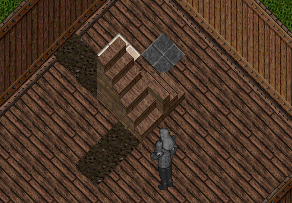
Place steps (southward) on the teleporters with the bottom
being on the green tile. Once the stairs are placed, use tool
C in the table above (wall clear). Click the floor 2 times
so the stairs and walls disappear. Delete the teleporters
and then restore the walls by clicking on the floor you are
on (tool D).
You should be left with |
 |
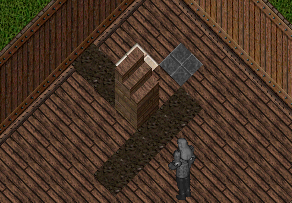
Now that we have the first level. It is time to create
the 2nd level. Place 2 teleporters out on the west side of
the blue tile.
Again, Place stairs over the teleporters and repeat the wall
clear process, delete the teleporters are show the walls.
As you can see, the bottom part of the stairs will remain. |
 |
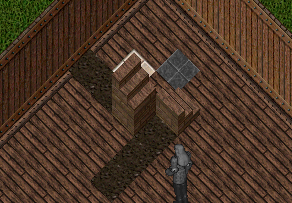
In order to delete the stairs, use the delete tool to delete
the first level of your spiral that you build off the green
floor tile.
This will delete the bottom part of level 2 but also shows
that you need to rebuild the first step of the spiral. |
 |
| Rebuild the first level the same as you did before. |
 |
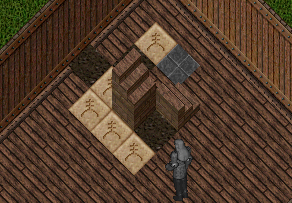
Now we are going to place teleporters off the white tile
with the 3rd part of the steps over the white tile. This would
mean 2 teleporters to the south and 1 to the north.
Now, because you will be left with hangover, you will need
to also place a few extra tele's along the south side of the
2nd level of your spiral staircase. |
 |
You will first need to place stairs over the extra teleporters
you placed (pictured to the right).
Use the wall removal tool and delete the teleporters UNDER
the stairs you just placed.
You should be left with the first step when you show the
walls again. |
 |
| |
 |
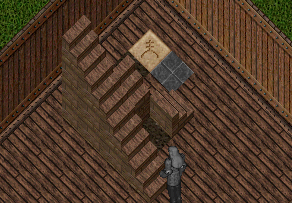
| Now we are ready to place the level 3 of your spiral. |
 |
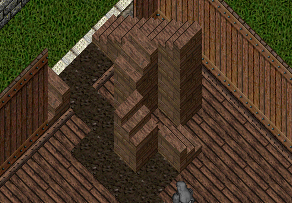
Use the wall clear tool and delete the teleporters. Once
you do this and show the walls again, you will be left with
the 3rd level of your spiral staircase as well as the bottom
of the staircase.
|
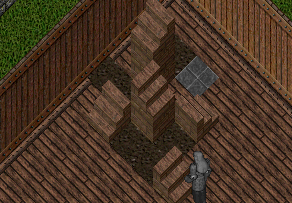 |
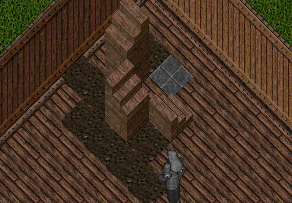
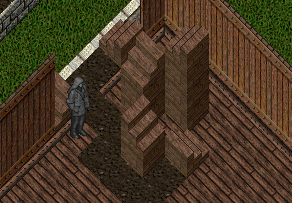
Now, in order to get rid of the bottom step from the 3rd
level, delete the base steps that my character in the above
picture is standing next to.
This should clear both sets of base stairs but leave the
3rd level. |
 |
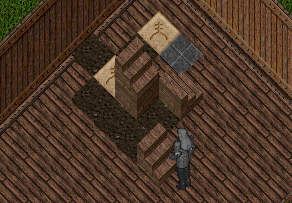
It is time to move on to building the 4th level. Much like
we did for the 3rd level, we will be placing an extra set
of steps out to make sure that we have something extra to
delete to remove extra pieces that are left behind.
I will be placing 3 tiles out to the west of the black floor
tile (level 4 of the spiral) and then from there, as you can
see by the picture, 2 more teleporters south of the westernmost
placed.
|
|
| Place stairs over the western most teleporters so the first
step is actually not on the teleporters. |
 |
| Use the wall clear as you have previously and delete the teleporters
under the staircase. This will, of course, leave the one step
showing when you show the floor. |
 |
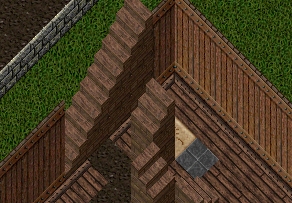
| Now it is time to place the stairs for the 4th level of your
spiral staircase. |
 |
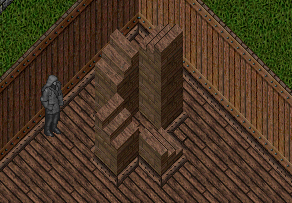
| Use the wall clear and delete the teleporters. You will be
left with the level 4 of your spiral staircase as well as the
tip of the staircase. |
 |
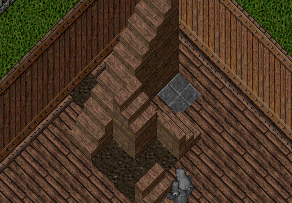
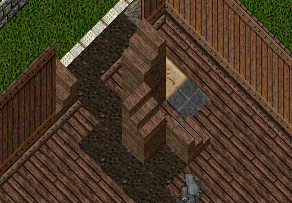
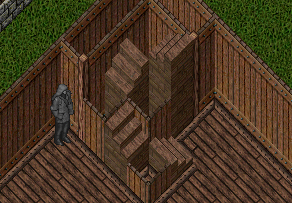
Delete the stairs that are behind my character. This will
remove the hangover from the 4th level of your spiral as well,
leaving you with a spiral staircase and a home in much need
of repair!
Add in your missing floor tiles as well as the walls. |
 |
| I am going to add some walls around the spiral to block it
off and make it look more in place with the rest of the house. |
 |
| Don't forget to make sure the floor above is valid with flooring. |
 |
| Time to commit your design, but you aren't done yet! |
|
What we need now are square gozas - at least 3.
You will need to place the gozas in the open "holes"
between the staircase levels. You may need to use a circle
of transparancy to see between level 3 and 4.
Once you have the gozas placed, use your house decorators
tool to raise them up to the level to cover the whole and
allow you to walk freely from one level to the next.
DONE! |
 |